|
Many thanks to @Paulaeliza for allowing me to co-opt this swap for our group.
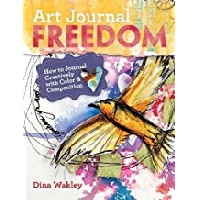
For this art journal technique swap, we're going to create one, 5x7 art journal page using a mixed media technique originally compiled from mixed media artist Dina Wakely's Art Journal Freedom: How to Journal Creatively with Colour and Composition.
For this swap, you'll need the following materials:
Water color paper (you may use a large sheet of it, but ensure that it is cut to size before you send! You can use the leftovers of your creation for future projects. Personally, I will cut mine to size before I begin the actual collage portion of this project to ensure composition continuity.) Spray inks (I would pick 3 you like to start) Permanent ink pads (you choose your colours!) Rubber or Cling Stamps (background patterns, and focal images) Stencil (storebought or one you've made) Sheet music or page from a book A Manila tag White Stabilo Marks All pencil, white, fineline Sharpie, or white gel pen Paintbrush Water Paper towels Adhesive (craft glue, glue stick, tape runners, etc. Ensure that the adhesive is appropriate to the media used and will adhere!) Paper cutter (or scissors if you don't have one) Scissors Nonstick craft sheet or other protective covering to cover your work surface OPTIONAL: Gesso OPTIONAL: Matte medium OPTIONAL: Dye-based markers (the ones you can use for stamping such as Copic), Faber Castell Gelatos, Neo-Colours, etc.
The Step-by-Step Process:
Cover your work surface with the nonstick craft sheet or other protective covering. Spray one-third of your paper with one color ink. Spray one-third of your paper with your next color ink. Spray one-third of your paper with your third color ink. Let it dry or dry it with a heat gun. Wet a paint brush and draw large circles on the inky paper. Use a lot of water of this, then lift up the paper and let the water run off the sheet. Blot the paper and your work surface with paper towel, or you may use another piece of your paper to blot. Dry completely. Use your coloured sprays (any colour, any combination) to create your stenciled images. Lay your stencil down over the page and spray different areas of the stencil to add visual interest and texture. Stamp background type stamps over parts of your paper using permanent ink. Stamp, ink, and or stencil your tag. Cut it up into pieces or use it as it as is, as an element for your page. Use your stamps to stamp some images on clean white Bristol or card stock and cut them out. They will also be elements to add to your page. Tear a few strips of sheet music or book pages. Now use the strips, tag, and stamps to collage your page! Glue everything down in an arrangement that pleases you. Use the white pencil, pen, or fine line Sharpie to add journalling elements to the squares and your collage. If you don't know what to write, write about how this experience made you feel.
IMPORTANT NOTE: Colour and composition is purely artist's choice. The steps above should be followed as this is, after all, a 101 Swap! But feel free to go above and beyond the steps. Add highlights, subdue or enhance elements in your piece! It's your creation so don't feel bound by a set of "rules". Once you've done the basic steps, art on, my friends!
Optional Item Use:
If you elect to use gesso to reinforce your page or add grip or texture to your blank page, ensure that you apply that first. You may also, at any time, add layers of gesso to highlight or subdue any of the elements you've added to the page. Again, this is artist choice and not required. Matte medium may be used to further adhere elements to the page once they've been glued down. You may also use matte medium to add a smoother texture in areas on your page where you might feel so inclined to use Gelatos or some other type of mixed media medium. Dye-based markers (the ones you can use for stamping such as Copic), Faber Castell Gelatos, Neo-Colours, etc., may be used to add highlights to stamped images or any other area or element of your collage. If you did elect to use these, make sure you note that for your partner!
Administrivia
ONE 5x7 art journal page created as described above to ONE partner. NOTE: This page is front only, and you do not need to leave a margin for binding. It is entirely up to your partners to decide how to use or display the page. Please do sign the back of the page as the artist though! Ship flat and in a sturdy envelope so that it doesn't bend in transit. Include your username and swap name in the envelope. Optional - Feel free to include a note talking about what you loved or hated about this technique! Send on time, rate promptly. If you're going to be late, communicate with myself and your partner. Late sends without communication perfectly warrant a 3. Flaking will have you removed from the group. And of course, I will angel on the off-chance that someone gets flaked on.
Feel free to DM or leave questions in the comments!
|


